Today I’d like to share some of my favorite exercises I teach at workshops that help to turn off your ‘left brain’, slow down, and really see your subject. Strengthening your right brain will ultimately enable you to draw more quickly and accurately.
These are fun, but challenging exercises, which I still enjoy doing frequently to warm up my sketching muscles and brain. Challenging because as you are attempting these exercises, your ‘left brain’ fights with your right for dominance. An appropriate analogy might be if you visit a country where you have to drive on the opposite side of the road. It’s a struggle at first since your brain must work harder, not being able to ‘cruise on autopilot’ (forgive the pun!). This in turn, keeps you 100% focused on the current moment, a prerequisite for lifelike drawings, which is why the act of sketching is similarly meditative to activities like yoga, throwing pottery or juggling. If your mind wanders away from the present, even for an instant, you’ll lose balance and fail to achieve your best work. Focusing on the moment forces all other thoughts of the past or future from your brain; all worries, regrets, plans and musings, which is a truly relaxing and transformative practice.
Some of the sketching exercises that follow were first popularized by Dr. Betty Edwards in her groundbreaking book Drawing on the Right Side of the Brain, which I have adapted with examples from nature. Others I have come up with in the course of teaching, sharing those that worked best for my students.
All these exercises focus on drawing the silhouette or outline of your subject. They are organized in order from what I perceive to be the easiest to hardest, though everyone’s brain may struggle with each one in a different way. For each exercises, just go slow, go with the flow and don’t get frustrated. Remember the most important lesson here is the process of seeing and learning to observe more deeply and patiently. The final product is irrelevant, but will certainly improve as you continue to practice. Give one or all of them a try and you’ll soon see your drawing skill and confidence rapidly improve!
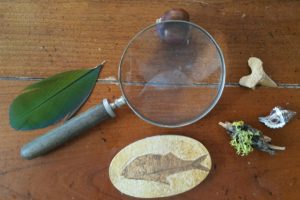
What you’ll need: a pencil, paper, and a variety of small objects; perhaps from your Cabinet of Curiosities. I suggest things like seashells, leaves, seeds, bones, dried insects, and the like.
You may also use photographs, which are sometimes easier to start with since they are already flat so you won’t be distracted by the added complexity of 3-dimensional form and shadows. As in my examples below, pick objects that fit on your paper, and draw them the same size as they are in real life (unless you want to challenge yourself with the added complexity of reducing or enlarging them, which is a great exercise in practicing drawing correct proportions).
CONTOUR DRAWING
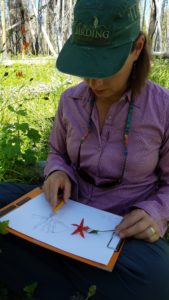
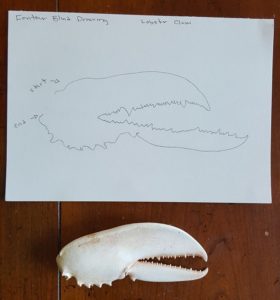
Method: In a contour drawing you draw without looking at your paper or pencil. Start at the 12 o’clock position and go clockwise around your subject. Use your other hand to keep your paper steady. Keep your eyes exclusively on your subject, moving them slowly, as if you are an ant crawling along the edge, with your pencil moving at the same pace.
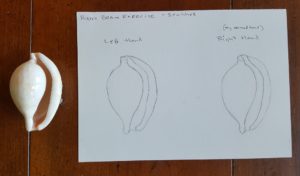
NEGATIVE SHAPE DRAWING
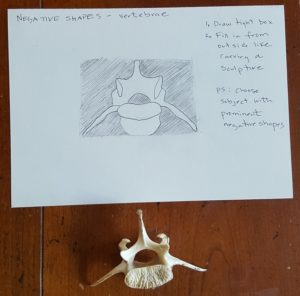
Method: In a negative shape drawing, you will focus on drawing the negative shapes around your subject. First draw a box around your subject, and a box the same size on your paper. Then start shading with your pencil from the outside in, as if you are a sculptor, carving away the marble to reveal the shape inside.
UPSIDE DOWN DRAWING
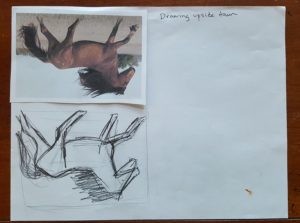
Method: In an upside down drawing, you position your subject upside down, and draw it in that same position. This exercise works best when your subject is something that has an obvious top, like the horse photograph, not something like a seashell or leaf that looks normal which ever way you orient it.
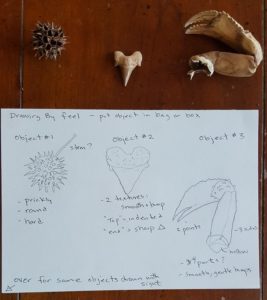
TACTILE DRAWING
Method: In this challenging exercise, put your subject in a box or sock or bag and draw only what you feel. This works best if you can have a friend choose the subject and hide it without you looking at it first. As with other drawing methods, verbalizing what you are seeing (or feeling in this case) can help you draw it, such as “It feels prickly, or soft or smooth”.
NON-DOMINANT HAND DRAWING
Method: For this exercise, you draw with your non-dominant hand. So for example, if you are right handed as I am, you would draw with your left hand. The main challenge to this exercise (unless you are fully ambidextrous) is that your non-dominant hand does not have the same fine motor skills needed for drawing. Nonetheless, if you proceed slowly enough, you may still produce a sketch that is more accurate than you’d imagined.
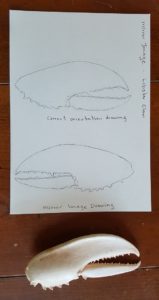
MIRROR IMAGE DRAWING
Method: This is probably the most challenging exercise of all but is a very valuable one. Choose a subject, then draw it facing the opposite direction. You will have the most success at this exercise if you use all of the techniques I have taught you from the robin and frog sketching tutorials, such as looking at angles, alignment, negative shapes, etc.
Today’s challenge
- Try at least one of these right brain sketching exercises for this challenge, though I strongly encourage you to try the others in the future as time and motivation allows.
- Extra credit: Post a description or photo of your sketches on our Facebook page.
Click here to return to Nature Sketching Challenge home page
Show Your Support
If you are finding value in the lessons from this Nature Sketching Challenge, I invite you to consider donating funds to support me in the creation and ongoing improvement of this program. Even the smallest donation helps me to know that I’m providing lessons that inspire, entertain and educate you about the natural world.
Click the Paypal ‘Donate’ button below to donate any amount you wish. You do not need to have a Paypal account to donate, you may choose to use a credit card if you wish. Thank you!

