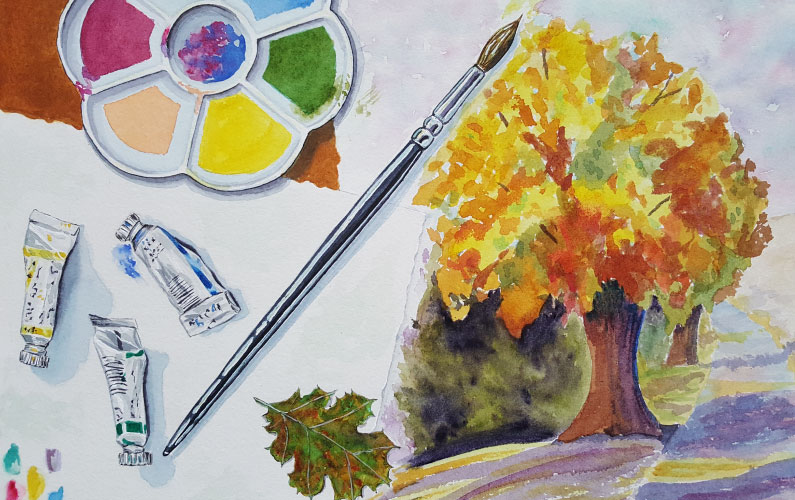
I love to reconnect with the natural world by taking my watercolor set out in the field. If you’ve dreamed of doing the same, but the idea is daunting to you, I suggest starting at the beginning by learning to mix and match colors.
Getting to know your watercolors is like getting to know a new friend – it takes time, trust and a playful attitude. Taking the friend analogy a bit further, after a little while, you’ll be able to recognize them across a crowded room, just by their laugh or on a trail ahead of you just by their stride.
And when you plan a dinner party, you’ll know which combination of friends will get along best, and which you might want to invite for a solo dinner date instead!
Can you recall an awkward first date? Perhaps you felt all stiff and controlled, afraid you might say something silly? That’s how many folks feel when first starting out drawing or painting – stiff and controlled…and that’s no fun! And like dating, the only way to get out of that phase and truly express who you are (fun and beautiful, yes!) is to loosen up and play.
If you desire to paint on the go, as I often do; in a café, museum or at a picnic table…then getting to know your colors intimately is even more important…for you don’t have all day to capture the colors of say, a robin’s rusty breast before he takes wing or the pink of a torch ginger at a botanical garden before a thundershower. You will feel so much more confident in painting, and doing it quickly, when you instantly know that the robin’s breast is burnt sienna, or a combination of scarlet lake and ultramarine, for example.

Time to Play with your Paints!
Have a ‘playdate’ with your watercolors and try the exercises below. They’ll help you to get more acquainted with your paints and you’ll be ‘besties’ in no time!
I’ve included basic samples below, but feel free to follow your own muse and be as creative as you want.
1) Create a Glazing Grid
Here you’ll paint parallel lines of all your colors and let them dry thoroughly (you’ll know when it’s dry when it no longer feels cold to the touch). Then paint those same colors across at a 90-degree angle. In this way, you’ll see how all of your colors interact with each other, in other words which are more transparent, which are more opaque, which modify others strongly, and which barely make a difference, and which combinations are most pleasing to the eye.
Pro tip: Glazing is when you paint one color over another one that is already dry, in order to modify the existing color. It’s a great technique to use when you feel like the color you’ve painted isn’t quite right and you wish to change the hue or value.

2) Paint Some Color Swatches
Make swatches (about 2 inches square) of each of your colors with their names on the back and quiz yourself. Learning the vocabulary of color is like learning to read as a child – you can’t form sentences until you learn words.
Extra credit: challenge yourself even more, and create secondaries from your primary colors and make swatches of those too.

3) Design a Color Wheel
Make a good old fashioned color wheel. It doesn’t even have to be a wheel, just any kind of graphic representation of the colors in your palette and how they mix together. So even if you already have secondary colors in your palette, go ahead and mix your own by combining yellow and blue to make green; yellow and red to make orange; and red and blue to make purple. Go a step further and make tints and shades of each of these, and you’ll appreciate just how many colors you can create by even the simplest of palettes.
Extra credit: attach your color wheel to your sketchbook so you can refer to it when out painting in the field!

4) Take a Field Trip
Take swatches from your color mixing exercises outside or around town and practice putting color names on things you see…You might notice a leaf you call sap green, a sunset that’s gamboge, or a beetle that’s burnt umber… you get the idea!

5) Mix & Match Colors
Collect some ‘nature treasures’ as I call them… seashells, stones, leaves, flower petals. Practice matching their color as precisely as possible and writing down the ‘recipe’ that was most successful. To help isolate the color you are trying to mix, I suggest making a little viewfinder from a small square of watercolor paper with a hole cut in the middle.


Let’s wrap this party up!
I hope these examples will inspire you to unpack your watercolors, explore the possibilities your own palette of colors provides, and have a little fun while you’re at it. Exploring the behaviors and interactions of your colors with each other will surely make them feel as familiar and comfortable as old friends. And soon you’ll be confidently mixing the right colors for anything you desire to paint.
Pro tip: If you don’t know the names of the colors in your watercolor set or if you want to learn the standard names of additional colors, try looking them up online; for example, here’s a link to the names of Winsor & Newton colors.
Want to learn more about painting with watercolors?
Check out my online watercolor course to really go deep with your new watercolor practice.
![]()